Technological modelling and DVC in years 7–10
The year 7–10 students at St Peter’s Gore follow a generic technology rotation in multiple specialist areas, including food, digital, textiles, product design, and design and visual communication (DVC).
- See Raising achievement in years 7–10 technology to find out more.
For the DVC rotation, the teachers wanted to explore a wider range of technological modelling techniques and have students realise their designs in a 3D form. They wanted to find out whether this would help students to:
- deepen their understanding of design development in DVC
- make connections between DVC and other areas of the technology learning area
- be better equipped to use a wider range of technological modelling tools
- test their designs more thoroughly in other rotations to mitigate risk and ensure fitness for purpose.
This approach has recently been trialled with two classes and two projects.
The headphones project
The brief given was to design a pair of headphones for the teenage market, to be used for either listening to music or gaming.
The class began by analysing two different styles of headphones. They compared Beats by Dre headphones against the Sennheiser headphones.
This resulted in rich discussions about which physical and functional attributes had been prioritised in the different headphone styles. The attributes explored included:
- the appearance features of the headphones as a fashion piece,
- comfort
- fit
- performance in terms of functionality.
The students had to decide what the focus of their designs would be:
- Was functionality more important than the headphones being a fashion statement?
- Could they come up with a design that addressed both of these attributes?
Drawing skills, rendering, and producing isometric drawing were covered in the first two classes of the week and the next three were spent on their headphones design project.
Once the students had developed their own conceptual statement and specifications, they drew their designs on paper. They found it quite challenging to design – taking into account anthropometrics and ensuring that the headphones would in fact fit.
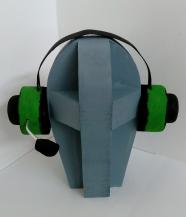
Students produced a cutting list based on their designs and measurements and the teacher cut the blocks of Styrofoam (high density polystyrene) to size. Students were then shown how to shape the foam using craft knives, sanding paper, rasps, drills, and desk mounted sanders.
Styrofoam is used widely in design industries for exploring aesthetic and ergonomic considerations and in architectural practices and in sets in film and theatre. It can be painted with water-based paints, which allows for the modelling to more closely match the final outcome.
Teachers noted that making a 3D model developed a much greater awareness of the need to consider ergonomics when designing products. It really tested the students’ ability to scale and make the headphones proportionally accurate to the size of their heads.
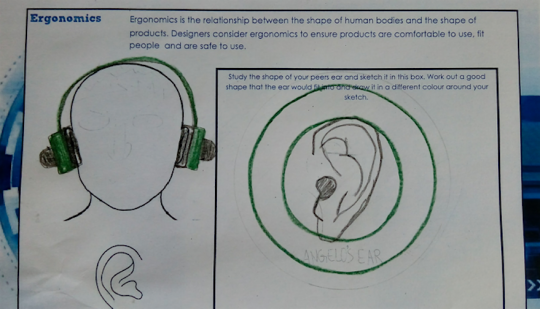
When this project was trialled with a second class, Aidan Forbes (teacher) organised the students to take measurements of each other's head sizes and ear sizes and then to sketch their design over a scale drawing to get the size and proportions right. It proved to be easier to develop accuracy around the ergonomics at this stage, rather than at the 3D modelling stage.
Everyone in this class got the size and proportion right in their designs.
The response from the students was very positive for this project and the teachers noted that the students were engaged when 3D modelling and there was a lot more “buy in” to their learning.
The lego character project
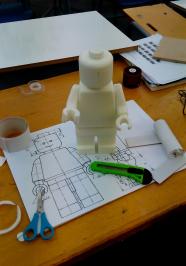
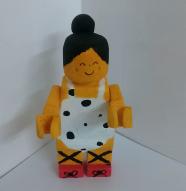
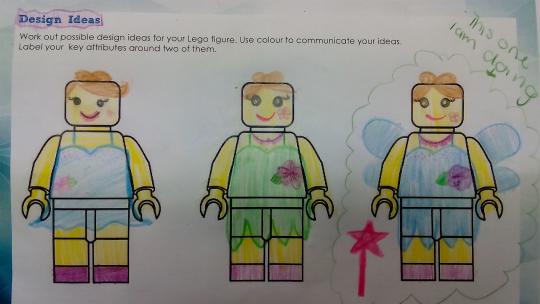
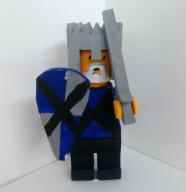
The year 8 students designed their own unique lego character.
The students were given a standard lego character parts kit. Teacher Aidan made the standard kit for each of the 60 year 8 students. He cut the basic forms out with the bandsaw. It took about three hours to produce enough parts for two classes, plus a few extras (approximately 70 kits).
Aidan broke the model down into modular parts, then cut the foam to these sizes, then created templates and cutting rigs for a head, arm, torso, hands feet and legs. It took about 4hrs repeating all the same cuts 70 times to produce all the kit sets. The lego character is approximately 30cm high.
Students are challenged to design their own unique character by adapting the standard lego character and adding accessories.
The students learnt about the possibilities of using styrofoam as a modelling material and created many different unique outcomes.
Next steps
Teacher guidance from level 1 onwards in the indicators of progression notes that it is important to develop students understanding of technological modelling by exploring examples of the modelling practices of technologists. So far the students’ modelling has focused on their own ability to model in technological practice.
Some of the ways the teachers are thinking of doing this are to have students research the examples of technological modelling described by technologists in the Technology Online weekly news items tagged technological modelling.
Another possibility being looked into is to find out about the examples of modelling being used in local community projects. Christine Elder at South Otago Technology Centre has done something similar.

