Butcher's block
Identifying client needs
Sam developed a butcher's block to provide more storage and preparation space in a small kitchen. Her client, who cooks two main meals a day, keeps food scraps for composting, and, due to her rural location needs to store large quantities of food, described the kitchen as disorganised and difficult to work in. After discussion, they agreed that a moveable butcher's block unit would provide a solution to this problem.
Research
When Sam researched and reviewed existing products she found that none had all of the attributes required in her client's specifications – she would be designing a unique product.
Finding mentors
She contacted five technologists from industry and arranged for them to act as her mentors, interviewing each of them about their knowledge and experience in developing a Technological Outcome, to inform her own practice.
Working within constraints
As her client lives one-and-a-half hours' drive from Auckland, Sam consulted her mostly by phone and email. She worked from photographs of the kitchen which enabled her to look at spacing/decorative issues and later to place mock-ups showing installation and aesthetic details. She had to work around a spacing restriction in particular, as the unit had to fit into a specific place in the kitchen.

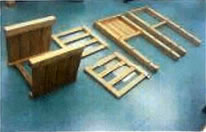
Assembling stage.
Modelling
Sam sketched some of her concept ideas and constructed four of these as 3D models. She discussed the concepts with her client during a phone consultation when they considered extra features that might fit into the unit, such as drawers and a railing for tea towels.
This stage of the process really highlighted for me the advantage of regular consulting sessions with a stakeholder when designing a one-off, unique piece of furniture.
Sam
Making modifications
After modifying the selected concept, Sam developed her design, sketching the options she could use for each feature, such as types of railing and decorative patterns for the top of the butcher's block. She researched the different materials she would need: wood, joints, woodscrews, wheels, drawers, and rails, and analysed which would be best for her outcome. Her client had added a new key factor reflecting the importance of sustainability to her, and they agreed that Sam would use recycled timber as the main material.
Creating an orthographic view
Sam completed her final design and used SketchUp to draw an orthographic view; she then constructed a prototype in wood. This provided an opportunity for her client to clearly see how the unit would work and to consider any extra features they might incorporate into the design. It also provided an opportunity for Sam to test how well certain ideas would work, such as the mitre joints for the border around the top.

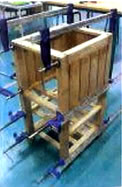
Clamping stage.
Technological practice
Sam located a source of recycled rimu and shopped around for the best deals on the other materials. Before beginning construction, she reviewed the codes of practice applicable to each piece of equipment she would use and learnt to use a Domino joiner to construct the joints. As there was no thicknesser at school, Sam arranged to use one elsewhere. During her designing and construction work, Sam consulted some of her technologists to discuss her ideas and the techniques and materials she might use.
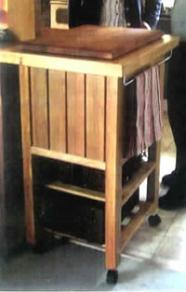
The unit was made with two bins, for recycling and composting, and two shelves underneath for storage. Sam added vertical wooden slats around three sides of the bins to keep them hidden as her client preferred but to allow ventilation. Sam had suggested adding wheels, to make the unit more flexible, in the form of twin-wheel castors with a braking system to make it safer with a small child around. To avoid undue wear on the unit, her client had requested an extra chopping block on top which Sam made from the rimu off-cuts.
She tested different finishes to decide which to use and trialled the router cutter to see which decorative effects looked the most effective. After consultation with her client they decided on a simple unadorned look for the block, although Sam did put some edging around the top to balance the overall look. After considering stain or varnish, she finished the block with teak oil.

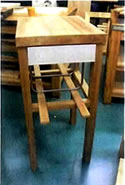
Finishing stage.
Final outcome
The unit came in under budget and fitted perfectly into its location and, with the substitution of ice buckets for compost bins, is being used for outside meals as well. Sam is satisfied that her outcome is fit for purpose and has more uses than her client had envisaged. She was awarded a New Zealand Scholarship in Technology for her efforts and is now studying towards a product design degree at Massey University.

