Outside shower

Scale model of the shower.
Identifying a need
Luca's family enjoys swimming in their pool and at the nearby beach, but his father had had enough of kids traipsing water or sand through the house on their way to the shower. After seeing an outside shower in a shop, he decided this would solve the problem and asked Luca to create one.
Research
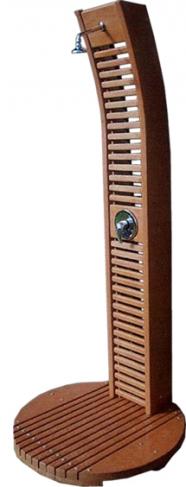
Luca investigated existing outside showers and then discussed ideas with his father. They agreed that a modern look would complement the style of their house, and Luca sketched some designs for a shower and base.
Specifications, attributes and compliance considerations
Luca had to consider the ergonomics involved in a shower used by all the family – it had to be high enough that his 1.93-metre-tall father didn't have to stoop, but with a tap low enough for small children to easily operate. He also considered legal requirements for outside installations and consulted a plumber who told him he didn't need a permit for the job.
Developing a model
Luca discussed his concept designs with his father and they initially decided to develop the shower with dowel rods going up the front of the upright – his father chose a rounded base to offset the rectangular look of the shower. Luca researched the different varieties of wood suitable for an outside project and, after consulting his client, decided to use tanalised pine due to its durability, resistance to weather, lightness, and lower cost.
After completing his orthographic drawings, Luca modelled the shower in balsa wood. He says this helped him decide on the size and spacing of the slats as well as the overall look, and also led to a redesign of his final concept. As the dowel rods proved difficult to obtain in a larger size, he decided to use slats for the entire construction.
As the upright section would be over two metres in height, Luca was concerned that it shouldn't topple over, especially in use, so used four brackets (two on each side) to ensure it stayed in place. (His design included the option of securing the shower to the ground, although he didn't need to use this in its intended location). He used galvanised stainless steel brackets and bolts for their strength, durability, and resistance to weather. As the shower would be installed in a temporary location, Luca used PVC piping, its durability not a concern because his client planned to replace it with copper piping when he moved the unit to its permanent situation.
Client feedback
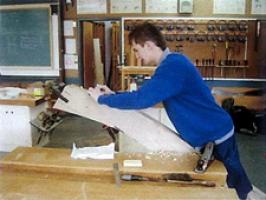
Luca consulted his client on the final design and made a template out of scrap wood, before beginning construction. He stained the shower to further protect the wood from the weather and to help seal in the toxins in the treated timber, as well as for the aesthetic effect. Luca made a plan drawing of the base in MDF which he used to guide him in construction. He had decided on slats so that the water would run through as people showered and, after considering measurements, spaced them at 5mm intervals to ensure that even the tiniest toes wouldn't get caught between the slats. After cutting out the base he decided to make a support beam to go underneath to ensure its strength and stability.
Practicalities
As in many schools, Luca had to work around limited access to machinery due to 45-minute periods and high student-use, but by arranging weekend access to the workroom he was more easily able to complete the larger tasks.
Luca consulted the plumber for advice on connecting the shower to a water supply, but at that stage connected only one pipe to the mixer tap as his father planned to use only cold water until it was in a permanent position.
Installation
The shower has since been permanently installed, and plumbed for hot and cold water, but if circumstances change in the future it could again be used as a cold-water, moveable shower.

