Night-lights as technological systems
Introduction
This case study features the second of three units in a year 3–4 programme focused on enhancing student understandings of technological systems. The first unit is Technological systems for year 3–4 students: Hydroponics. The third unit is A dairy farm as a technological system.
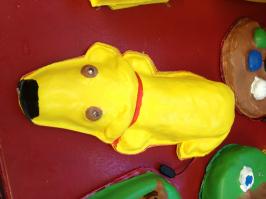
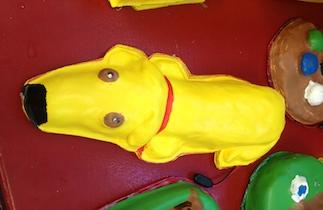
For this unit, Andrea Robertson of Silverstream (South) Primary School found that the context of planning and making night-lights helped her year 3–4 students:
- enhance their understandings of technological systems
- grow their understandings of electronics
- create an outcome they valued.
Background
When planning for the following year, teachers of years 3–4 at Silverstream (South) Primary School decided that the focus for their technology programme would be technological systems.
Phase 3 Beacon Practice teacher Andrea Robertson, formerly a pre-service lecturer in technology at Otago University College of Education, would facilitate the programme.
Andrea has recently returned to the classroom. A former colleague Ange Miller from the Otago University College of Education was keen to work alongside her to develop a unit on technological systems using electronics.
Preplanning
Andrea budgeted $5 per student for this unit. She was able to borrow 9 sets of Brain box and some older style circuits from the University of Otago Teachers College. The College also lent a plastic former. Clay for modelling was already available in the school. Angela prepared small MDF boards for mounting the night-light circuits onto and purchased batteries, LEDs, and wire from local retail outlets.
Andrea had a third-year trainee teacher with her who was required to have full control of the class for 3 weeks. To make this possible, Andrea planned to teach this unit in 4 weeks, which would then make this time available for the trainee teacher. The school runs a day with 90 minute blocks. She planned to sometimes have 3 hour blocks on the project and to use a whole day for technology if needed to ensure completion of the night-light.
The night-lights unit
As she did for the hydroponics unit, Andrea set up a “big book” to record the students’ questions, answers, and ideas. This was again used to revisit discussions and track progress. The big book consists simply of A2 sheets stapled together into booklet format.
Big Book: Lighting up the dark (PowerPoint 2007, 23 MB)
To start the night-lights unit, Andrea revised the students’ prior learning on systems. Their responses showed that they had retained some of the understandings covered in the earlier unit on technological systems and hydroponics as a technological system.
Paul Neveldsen, the Beacon Practice facilitator shared with Andrea a lesson designed by a student teacher at Auckland Teachers College. The lesson had a particular focus on technological systems and was based on the Dr Seuss book The Sneetches. In this story, Sylvester McMonkey McBean has a machine that he uses to remove and add stars to the Sneetches.
Andrea read the story to the students. They discussed the inputs and outputs of Mr McBean’s machine, and the students were then asked to design what they thought could be inside it.
This was an ideal opportunity to introduce the term black box …we don’t actually know what’s going on in Mr McBean’s machine. One student used the word pistons and another had a conveyer with the Sneetches moving along it to get their stars. It was perfect as a starter lesson for this unit.
Andrea Robertson
How can we see in the dark?
Keen to follow an authentic technology process, Andrea introduced the issue to the students: “How can we solve the problem of seeing in the dark?”
The class discussed the systems they had at home to see in the dark. The next day, the students each brought in a torch and pulled it apart, identifying the components – a battery, light bulb, and a switch wire with something to hold it.
Exploring electronic circuits
Andrea then introduced the Brain box electronic sets to the students. Following their torch analysis, they could easily identify how these worked. Angela explained the symbols for the components, and a number of students were able to draw their own circuits quite well.
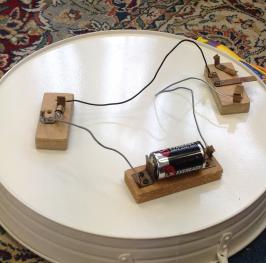
The older style circuits we had borrowed had switches on them. We were able to have good discussions about controls. It was quite easy for the students to grasp the concepts because we were talking about controls using real examples. I was also really glad we had the older style circuits because when it came to joining the wires, they had to do it quite securely.
Andrea Robertson
Andrea invited the school technician (a former technology teacher) to visit the classroom. He was most impressed with the students’ understandings – they were able to answer his questions about the circuits using the correct language (such as “components” and “controlled transformation”).
Over the next week, Andrea had the Brain box electronic kits out at every opportunity. In addition to forming basic circuits, the students played at making the fans go and connecting two different circuits.
Planning and modelling
Keen to weave education on sustainability into this project, Andrea showed the students a video clip that included characters from the Lion King and focused on “going green”.
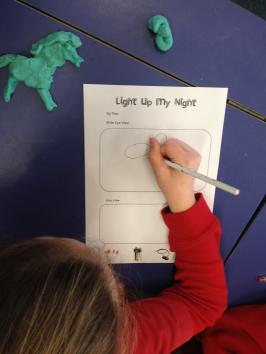
The students thought that if they developed a night-light, they would no longer need to leave a hall light or similar on when they went to bed – and this could conserve power.
The students wrote their brief and identified their stakeholders for the night-light. They then discussed why they needed a night-light and what made a good night-light.
The next session was focused on planning their outcome.
We showed them the night-lights that the university had kept from another project. They were very excited that they were going to make something as cool as this. A lot of the night-lights had their backs off, so the students could look at the circuits and how they were put together.
Andrea Robertson
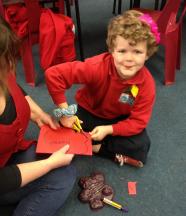
The students modelled their night-light using coloured play dough and drew a bird’s eye and side view.
Making the plastic casing for the night-lights
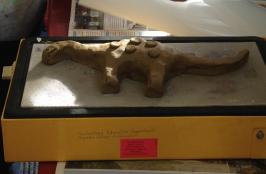
Finally, the students made a full-size clay model to be used in the plastic former. Many students had not used clay since preschool and found it challenging shaping the clay and using the clay tools and instruments.
At this point, Andrea explained the plastic former machine to the students and how it would be used to make their plastic casing for the night-lights.
Angela and Kate (the trainee teacher) did the plastic forming. The former was very hot so they involved the students by allowing them to put their clay into the former and to lift the lid.
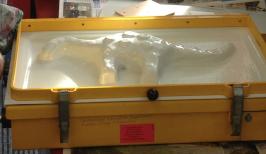
It took a whole day to make the plastic shapes on the former. While some students were still finishing their clay models, others refreshed their systems vocabulary using a word find. Angela organised other activities for students to revise their understandings of circuitry and a writing exercise on documenting the process to date for making their night-light. The students were asked to be patient to ensure everyone had their plastic casing ready for the next stage of the night-lights.
Once the base of their night-lights was formed, the students were able to trace around it and cut out the backing from core flute (material used on real estate signs).
Wiring
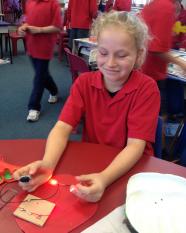
Students then created their circuits on the small pre-prepared MDF board. With the time constraints they were working under, Andrea ensured that all students stripped their wires and inserted their split pins to anchor the wires. She encouraged some students to do the soldering. The teachers finished off the soldering. All students soldered their LED lights on and five students completed the entire wiring process.
We had the odd breakage when we put them together. Some of the students had become class experts on doing the soldering and were very keen to turn on the soldering iron and carry out repairs!
Andrea Robertson
Decorating
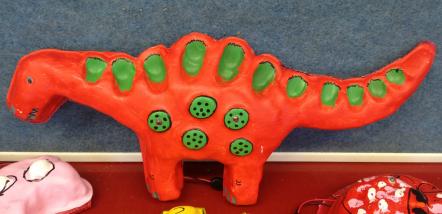
The students painted a base coat using test pots of commercial paint. Andrea encouraged them to “be minimalist – to know when to stop with colour.”
Putting it all together
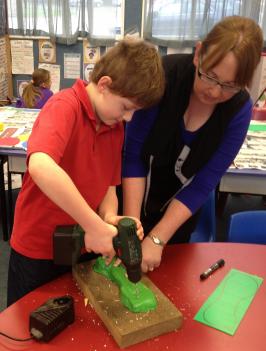
Supervised by the teachers, the students drilled through the plastic front of their casings using a power drill to create the holes for the LED lights.
I then got them all on the mat and they put their LED lights through the holes. They then marked out where the circuit mounted on the MDF board would go on the core flute base. The board was hot-glued to the core flute and then this was hot-glued onto the plastic front they had created using the former.
Andrea Robertson
Outcomes
We were planning to do something that you would normally not do with a year 3–4 class but they coped really well. Electronic systems were not an area of strength for me so it was great professional development for me to do it.
Andrea Robertson
Students were now more familiar with systems and easily able to describe the process of making their night-light. They could also identify components using the language of systems.
The modelling kept students focused and consistently following their design ideas.
I started off wanting to make a creeper – I planned it and I did it.
Year 3–4 student
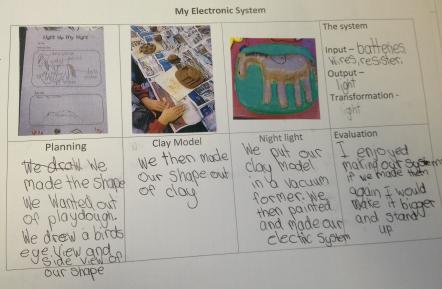
Andrea felt giving the students coloured photographs of their work and the process helped them to produce clear and thoughtful evaluations.
Using classroom observations and student evaluations, Andrea believes the students were all at level 1 for the technological systems component with some students heading into level 2 and 3 understandings.
The students presented their outcomes at assembly. A new Principal was visiting from one of the local secondary schools.
He was blown away that we were a year 3-4 class. It made him think about what they were doing at primary.
Andrea Robertson
After the night-lights had been shown at assembly, the students couldn’t wait to take them home.
A parent told me how her son had woken up really early – he just couldn’t sleep because of the excitement of taking it home.
Andrea Robertson
What next?
A unit plan has been developed for the project.
Unit plan: Electronics (Word 2007, 184 KB)
I would definitely do it again in 2 years time.
Andrea Robertson
Andrea plans to carry out the unit over a longer period of time – possibly 10 weeks. She sees the extra help she had from the trainee teacher as essential, particularly with using the plastic former and with the soldering work.
Next term, Andrea plans to explore with the students a dairy farm as a technological system.
