Technological systems in a toys context
Introducing the concept of technological systems
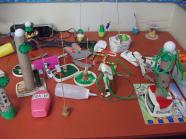
Year 2/3 students learnt about technological systems focusing on a toys , then designed and developed their own toys, which incorporated a simple system.
Columba College primary teacher Cheryl Pearson was looking at making technology more visible within her programmes of learning through using technology terminology and exploring ways of making it more accessible to young children.
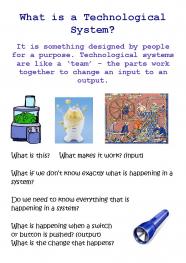
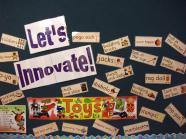
Cheryl taught an inventions programme of learning; Let’s innovate, as a whole-term integrated technology/ sciences unit. She introduced the technological systems component of the technological k strand through a both familiar and popular with her students – toys. Cheryl discussed what a technological is, as a reminder for her students. The students then looked at technological s which are also technological systems. In explaining these concepts to her students Cheryl used two examples of technological s from the classroom – a glue bottle (technological product) and glue stick (technological system). As they worked on their programme of learning, students could refer to a wall poster which summarised this discussion. Cheryl has since modified the poster, simplifying the language in response to student understanding of general vocabulary.
Poster: What is a Technological System? (Word 2007, 470 KB)
Toys as technological systems
Students brought toys from home, and the class considered whether a toy was a technological system and, if so, what sort of system. Student interest continued after the programme of learning had finished. When a student brought a viewfinder as an example of a technological system, the class discussed what its input and output were and realised that they couldn’t see some parts of the system (black box).
Looking at materials used for toys in the past
Having discussed the various toys they had brought from home, the students looked at "Toys from the past". They interviewed their grandparents about the toys they had played with as children.
The class used this information for a chart showing the types of materials used. They found that most of the old toys were made from wood or metal, and soft toys were made from fabric.
Cheryl took her class to the Otago Settlers Museum for a LEOTC (Learning Experiences Outside the Classroom) workshop "Toys from the Past". Students had the to explore antique toys, play with replica toys, and make old-fashioned-style toys.
Toitū Otago Settlers Museum website
Industrial designers discuss making a technological system
A parent, prepared by Cheryl with a list of questions the children might ask, visited the classroom with a colleague to talk about her work as an industrial designer for appliance manufacturer Fisher and Paykel. The two designers showed the students a slide presentation that described the involved in developing a dish drawer. This included testing, which involved soiling plates with exact amounts of different-coloured food products to that each space in the drawer washed properly.
The children were interested in finding out how the development worked. Cheryl says it was fantastic for them to see that they were following the same and using the same terminology as a “real technologist”.
After discussing how children help their parents cook at home, the designers set the class a task.
Students were divided into groups and given one of two briefs:
- Design a safe stool for children to use while helping mum or dad at the kitchen bench
- Design a safe knife for children to use in cooking.
Each group sketched their ideas on A3 paper. The students had lots of questions during the whole visit. Cheryl notes that the designers were “blown away with the quality of the questions they asked”.
Designing a toy system
Brief and specifications
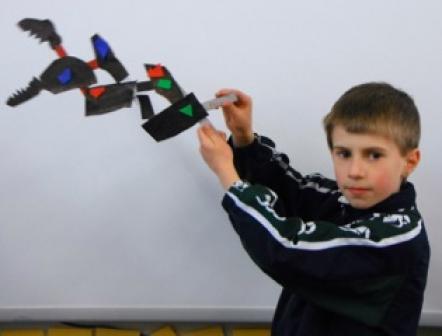
The class looked at mechanisms commonly used in toys – levers, cams, springs, wheels, pneumatic pressure, tension wind-up and oscillating mechanisms. Their for the toy unit required that they: Design and make a toy that moves in some way. Students could choose which kind of toy they made.
They were given specifications that it had to:
- be made from mostly recycled materials
- have a system resulting in movement
- be joined strongly enough to be used repeatedly
- be fun to use or look at.
Cheryl had made little mock-ups of toys with different sorts of technological systems so that the students could see how these mechanisms would work. She decided, however, that working with cams might be a bit difficult for young students to achieve successfully, given the time frame, and chose not to explore this further.
Planning for practice
Each student sketched three ideas for a toy with a technological system. The students then chose one to develop further. They sketched their concept, noted the materials they would and the type of system it contained. Cheryl had provided a selection of recycled plastic containers, boxes and cartons, and joining materials such as masking tape, glue, and split pins.
Functional modelling
The students developed a of their toy to test that it worked. This also provided an to see if particular materials would work for their purposes. Students developing pneumatic pressure toys found that some plastic bottles were too hard and they couldn’t air out of them, while others worked once but the bottle crumpled and couldn't be reused.
This functional modelling allowed students to try out their ideas to see if they worked. Based on the feedback they got from modelling they were able to modify or adapt their .
Developing outcomes
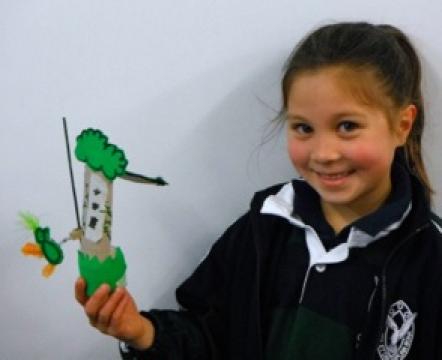
Emily's design incorporated an oscillating mechanism by which a bird would move down a cardboard cylinder, but it didn't work when she modelled it. Emily changed her design, still using a cardboard cylinder for the tree trunk, but having the bird move down a bamboo skewer next to the tree: “I changed it to half a tree with a roof. Another time, I might put some vines coming out and have two birds, with the baby bird falling down and the mother catching it”.
Elisey, who created a lever toy in the shape of a crocodile, says that his mock-up showed that he cut the scales the wrong size. He found that some of them stuck together when he operated the lever. He adapted his deign by making more, and bigger, scales. Elisey adds that the mock-up was harder to make because he didn’t have the strong cardboard he used for his final .
Reflections on learning
After developing their toys, the students identified the type of mechanism in the system they developed to make their toy move and the input and output. Students evaluated their own work, then had it evaluated by another student as a formal peer assessment activity.
Cheryl says that a lot of students changed their designs during the . Some were inspired when they saw other students using different materials, while others decided to change because their idea when tested through functional modelling didn’t work or proved too hard to complete.
The programme of learning, she says, was challenging but also fun and rewarding for the students, who were delighted with what they could achieve. Cheryl felt that this programme of learning also enabled the consolidation of understandings of technological systems for her and her students.
What next?
Cheryl is already planning other activities to learn about technological systems. She has talked to the owner of a local appliance-repair company who will pass on to her appliances he can’t fix. Cheryl will take apart the appliances (such as old toasters) so that the students can look at the components inside them. She will also bring in working appliances, such as a popcorn maker, so that students can see them in action while they learn about the concepts of systems.

