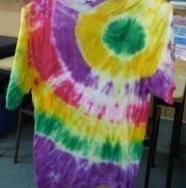
Technological modelling in tie-dyeing
Teaching inquiry
Can I teach functional modelling in conjunction with art and social sciences? Can I do some explicit teaching about the key competencies at the same time?
Strategy
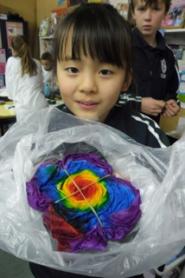
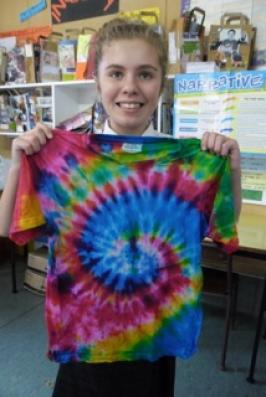
Dorothy Hutton of Columba College found that her year 6 students were excited about producing their very own tie-dyed T-shirts.
Her integrated technology unit using tie-dyeing supported her students to:
- feel proud of their work and engaged with their learning
- meet level 2 and 3 indicators in technological modelling
- increase their understanding and development of the five key competencies.
Dorothy’s sister had inspired her to try tie-dyeing with her year 6 class:
My sister had done a lot of tie-dyeing with young people in church groups and at holiday programmes. She assured me that it would be achievable as long as I had a couple of parent helpers. Knowing that she had tested the dyes and the process encouraged me to take the plunge and do it! Her phone and email support was invaluable.
Dorothy Hutton
Select the headings below to read more.
Preparation
The students researched tie-dyeing in other cultures and, for homework, looked at the different techniques available and the effects they could obtain.
Dorothy asked parents to either buy their child a plain cotton T-shirt ($4.95) or find a second hand one in a thrift shop. Then she ordered the cold-water dyes.
In an earlier unit on painting, the students had been learning about the language of visual art.
They had already encountered ideas such as white space, shape, colour, contrast, primary and secondary colours, tinting, and blending – and I related this prior learning to tie-dyeing. This gave them vocabulary to use when recording their research.
Dorothy Hutton
Dorothy had the students write down the various steps in the tie-dyeing process. As this was their first attempt at the process, they followed the advice given with the dyes and batched the samples and later the T-shirts (left them in the dye bath overnight).
A student's list of steps to tie-dye a T-shirt (PDF, 351 KB)
Before trialling the process, the class discussed the key competencies. Dorothy explained what they meant, and the students then completed a three-triangle self-assessment of where they were in relation to each competency. They also created a graphic organiser in which they identified how they would demonstrate the competencies during the tie-dyeing.
I asked them, "If this is what thinking means, how will you be thinking when you are tie-dyeing? If this is what managing self means, how will you manage yourself when you are tie dyeing?" The students were very honest about where they were at in terms of the competencies, and they set their goals for the tie-dyeing exercise around this. I have the key competencies on the classroom wall and we often talk about them, but the tie-dyeing gave them something real to set goals around.
Dorothy Hutton
Key competencies related to tie-dyeing (Word 2007, 178 KB)
A student's plan to use the key competencies 1 (PDF, 316 KB)
A student's plan to use the key competencies 2 (PDF, 258 KB)
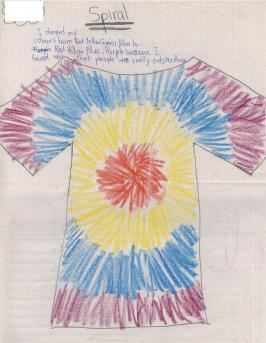
The students sketched their initial ideas for the tie-dyeing and annotated these using key words from the language of visual art.
Each student wrote their own project brief, including the conceptual statement and the physical and functional attributes.
Because the T-shirt was quite a simple garment, they found it difficult to define its functional attributes. Next time, I will probably get them to describe the functional and physical attributes of the applied design rather than the shirt itself.
Dorothy Hutton
Functional modelling
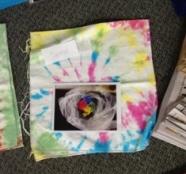
Using old cotton cloth, Dorothy demonstrated the dyeing of six patterns using different types of tied resist. The students discussed the techniques as they watched and told her what colours they would like her to use. Photos were taken of the various methods and the resulting patterns.
Functional modelling of cloth to choose tie-dye pattern (PDF, 356 KB)
The students recorded their changing ideas and plans throughout the process, sometimes using the de Bono Six Thinking Hats® as a prompt for their reflections.
I asked them, "What are your first thoughts?" "What do you think now that you have seen the results?" At first, they found it difficult to be honest. I was frankly disappointed in the results of my functional modelling – the colours were dull, and there was so much white space!
Dorothy Hutton
A student's reflection on the functional modelling 1 (PDF, 444 KB)
A student's reflection on the functional modelling 2 (PDF, 341 KB)
The trialling process provided opportunities for rich discussions on functional modelling. The students could see that, to get stronger colours, a lot more dye would be needed. Dorothy bought some squirt nozzle bottles so that the students would be able to squirt dye into the folds instead of dribbling it from a spoon.
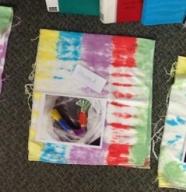
|
|
| A cloth sample tied with the pleated pattern | A cloth sample tied with the spiral pattern |
The functional modelling also provided important information on the kinds of patterns that would result from different types of tie resist. Now that they had seen the outcomes, Dorothy asked the students to think about what choices they would make.
Their responses included:
I am not going to do the spiral; I am going to do it this way.
Student
I don’t want it to have white space – I want it to have a lot more colour.
Student
I would rather put this colour next to this.
Student
Dorothy revisited functional modelling by having the students watch a video on the Yolkr – an egg yolk separator recently developed by a New Zealand engineer.
The dyeing
As they were doing the tie-dyeing, the students talked about the different types of functional modelling they had used: thinking, drawing, talking, and mockups. They had not been able to do computer simulation. They each then wrote a mnemonic to remember the different types of functional modelling.
A student's notes about different types of functional modelling (PDF, 316 KB)
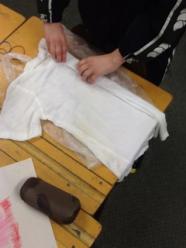
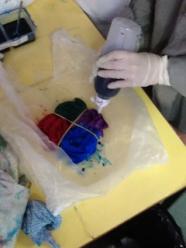
Some students became quite expert and helped the others; for example, with their pleating.

The students rinsed their T-shirts at school and then Dorothy took them home, rinsed them again, and washed them in batches of six. The dyes did not bleed, but the final colour was a little lighter following the washing.
With their T-shirts finished, the students did a reflection in which they commented on their understanding of functional modelling, the key competencies, and design.
A student's reflection 1 (PDF, 417 KB)
A student's reflection 2 (PDF, 353 KB)
What next?
Before attempting more tie-dyeing, Dorothy would like to do further trials to determine how much dye is really needed. The students used a lot of dye and she wonders if so much was necessary.
I felt, too, I could have spent more time on the design aspect of the unit and talked through this with the students in greater detail. The time to do this would have been when they had their own T-shirts in front of them. Also, I would like to encourage them to consider more than one design option.
Dorothy Hutton
Dorothy found that having the students record their reflections during the process was more effective than asking them to write reflections after they had finished. However, next time she will ensure the students have a formal reflective journal to record their reflections in so that they aren't located in various places in their work.
The student evaluations contain some great commentary on modelling, but Dorothy can see the need to be more directive: “Next time I will include questions that focus specifically on functional modelling and what the students have learnt.”
Student pride and engagement
You could see the excitement on the students’ faces as they opened out the dyed shirts.
Dorothy Hutton
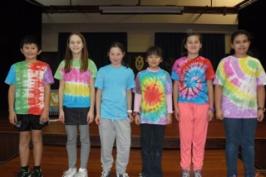
The students modelled their finished shirts at assembly and held up sheets of paper on which they had written the terminology they had learnt during the unit. They spoke to their peers about the project, describing what they had done and using correct terminology. The school newsletter also celebrated their work.
All the students proudly wore their T-shirts on mufti day.
Technological modelling indicators
Dorothy assessed her students as meeting the first two level 2 (and in some cases, level 3) indicators of the technological modelling component of the curriculum.
The students developed understandings of functional modelling appropriate for their curriculum level. They realised that they might not be able to recreate some of the designs they’d seen and liked online, so they adapted them to suit their skills as beginners. They learnt a lot about dye, dye strength, and application methods. They realised that absorbency has an impact, and made considered decisions about white space and fade-in and fade-out.
Dorothy Hutton
The cloth samples were a crucial part of the functional modelling. They provoked valuable conversations in which the students discussed what they would do differently when they came to dye their own shirt. Above all, they wanted less white space and brighter colours. The students noted these points on their drawings and then modified the dyeing process to try and achieve the desired output.
Prototyping, the other aspect of technological modelling, had been introduced in previous activities. Students could see the benefit of functional modelling in terms of how it had informed their own ideas. And they could see that, when working towards a prototype, this stage is crucial.
Tie Dye: Integrated Technology unit
Dorothy kept a record of the unit, together with modifications made following her first run-through.

